Questions and answers about Pepper3

Andy Balaam from Andy Balaam's Blog

Series: Examples, Questions

My last post Examples of Pepper3 code was a reply to my friend’s email asking what it was all about. They replied with some questions, and I thought the questions and answers might shed some more light:

Questions!

Brilliant ones, thanks.

In general though you’ve said a lot about what Pepper can do without giving design decisions.

Yep, total brain dump.

Remind me again who this language is for :)

It’s a multi-paradigm (generic, functional, OO) language aimed at application programmers who want:

  • “native” performance on their chosen platform (definitely including actual native machine code). This is inspired by C++.
  • easy deployment (preferably a single binary containing everything, with an option to link most dependencies statically), including packaging of installers for major OSes. This is inspired by C++, and the pain of C++.
  • perfect flexibility for creating types – “meta-programming” is just programming. Things you would have done using code generation (e.g. generating a class hierarchy from an XSD) are done by running arbitrary code at compile time. The powerful type system is inspired by Haskell and the book “Modern C++ Design”, and the meta-programming is inspired by Lisp.
  • Simple memory management without GC through ownership. This is inspired by modern C++, and then Rust came along and implemented it before I could, thus proving it works. However, I would remove a lot of the functionality in Rust (lifetimes) to make it much simpler.
  • Strong support for functional programming if you want it. This is inspired by Haskell.
  • The simplest possible core language, with application programmers able to expand it by giving them the same tools as the language designers – e.g. “for” is just a function, so you can make your own. I am hoping I can even make “class” a function. This is inspired by Lisp, and oppositely-inspired by Java.
  • Separation between the idea of Interfaces, which I think I will call “type specifiers” (and will allow arbitrary code execution to determine whether a type satisfies the requirements) and structs/classes, allowing us to make new Interfaces and have old code satisfy them, meaning we can do generic stuff with e.g. ints even if
    no-one declared that “class Int : public Quaternion” or whatever.
  • Lots of “nudges” towards things that are good: by default things will be functional and immutable – you will have to explicitly say if you want to use more dangerous constructs like side effects and mutable values.
  • No implicit conversions, or really anything happening without you saying so.

Can you assign floats to ints or vice versa?

Yes, but you shouldn’t.

If you’re setting types in code at the start of a file, is this only available in the main file? Are there multiple files per program? Can
you have libraries? If so, do these decide the functionality of their types in the library or does this only happen in the main file?

I haven’t totally decided – either by being enforced, or as a matter of style, you will generally do this once at the beginning of the program (and choose on the compiler command line to do it e.g. the debug way or the release way) and it will affect all of your code.

Libraries will be packaged as Pepper3 source code, so choices you make of the type of Int etc. will be reflected through the whole dependency tree. Cool, huh?

This is inspired by Python.

Can you group variables together into structs or similar?

Yes – it will be especially easy to make “value types”, and lots of default methods will be provided, that you will be strongly encouraged to use – e.g. copy and move operations. This is inspired by Elm.

Why are variables immutable by default but mutable with a special syntax? It’s the opposite of C++ const, but why that way around?

This is one of the “nudges” – immutable stuff is much easier to think about, and makes parallel stuff easier, and allows optimisations and so on, so turning it on by default means you have to choose to take the bad path, and are inclined to take the virtuous one. This is inspired by Haskell and Rust.

Why only allow assignments, function calls and operators? I’m sure you have good reasons.

To be as simple as possible, so you only have those things to learn and the rest can be understood by just reading the code. This is inspired by Python.

I wrote more of my (earlier) thoughts in this 4-post series, which is better thought through: Goodness in Programming Languages

Examples of Pepper3 code

Andy Balaam from Andy Balaam's Blog

Series: Examples, Questions

I have restarted my effort to make a new programming language that fits the way I like things. I haven’t pushed any code yet, but I have made a lot of progress in my head to understand what I want.

Here are some random examples that might get across some of the ways I am thinking:


// You code using general types like "Int" but you can set what
// they really are in the code (usually at the beginning), so
// if you plan to use native ints in the production code, it's
// a good idea to use:
Int = CheckedNativeInt;
// while in dev, since it will crash at runtime if you overflow.

// Then, in production when you're sure you have no errors,
// switch to an unchecked one:
Int = NativeInt;

// But, if you prefer correctness over efficiency, you can use
// mathematical integer that never overflows:
Int = ArbitrarySizeInt;


// Variables are immutable by default, so:
Int x = 4;
x = 3;      // this is a compile error


// But this is OK
Mutable(Int) y = 6;
y = y + x;

// Notice that you can call functions that return types that you
// then use, like Mutable(Int) here.

// Generally, code can run at either compile time or run time.
// Code to do with types has to run at compile time.
// By default, other code runs at run time, but you can force
// it to run early if you want to.


// A main method looks like this - you get hold of e.g. stdout through
// a World instance - I try to avoid any global functions like print, or
// global variables like sys.stdout.

Auto main =
{:(World world)->Int
    //...
};

// (Although note that Int, String etc. actually are global variables,
// which is a bit annoying)

// I wish the main method were simpler-looking.  The only saving grace
// is that for simple examples you don't need a main method -
// Pepper3 just calculates the expression you provide in your file and
// prints it out.


// Expressions in curly brackets are lambda functions, so:

{3};

// is a function taking no arguments, returning 3, and:

{:(Int x)
    x * 2
};

// is a function that doubles a value.

Obviously, we can tie functions to names:

Auto dbl =
    {:(Int x)
        x * 2
    };

// Meaning we can call dbl like this:
dbl(4);

// Auto is a magic word to say ("use type inference"), so
// this is equivalent to the above:

fn([Int]->Int) dbl =
    {:(Int x)
        x * 2
    };


// Because {} makes an anon function, things like "for" can be
// functions instead of keywords.

for(range(3), {:(Int x)
    world.stdout.println(to(String)(x));
});


// As far as possible, Pepper3 will only contain assignment statements:
String s = "xx";

// and expressions containing function calls and operators:
dbl(3) + 6;


// This means we can make our own constructs like a different type of
// for loop, which would need a new keyword in some languages:

Auto parallel_for = import(multiprocess.parallel_for);

Recording gameplay videos on RetroPie

Andy Balaam from Andy Balaam's Blog

Credits: this is a slightly corrected and shortened version of How To Record A GamePlay Video From A RetroPie by selsine, which is itself based on Recording Live Gameplay in RetroPie’s RetroArch Emulators Natively on the Raspberry Pi by Retro Resolution.

RetroPie is based on RetroArch. RetroArch has a feature to record gameplay videos, but the current version of RetroPie has it disabled, presumably because it was thought to be too intensive to run properly on a Raspberry Pi.

These instructions tell you how to turn the recording feature on, and set it up. This works perfectly on my Raspberry Pi 3, allowing me to record video and sound from games I am playing.

The code for this is here: github.com/andybalaam/retropie-recording – this was code written by RetroRevolution, with small corrections and additions by me.

Before you start, you should have RetroPie working and connected to the Internet, and updated to the latest version.

Note: you should make a backup of your RetroPie before you start, because if you type the command below you could completely break it, meaning you will have to wipe your SD card and start fresh.

Turning on the recording feature

RetroArch uses the ffmpeg program to record video. To turn on recording, we need to log into the Pi using ssh, download and compile ffmpeg, and then recompile RetroArch with recording support turned on.

Log in to the Pi using ssh

Find out the IP address of your Pi by choosing “RetroPie setup” in the RetroPie menu and choosing “Show IP Address”. Write down the IP address (four numbers with dots in between – for example: 192.168.0.3).

On your Linux* computer open a Terminal and type:

ssh pi@192.168.0.3

(put in the IP address you wrote down instead of 192.168.0.3)

When it asks for your password, type: raspberry

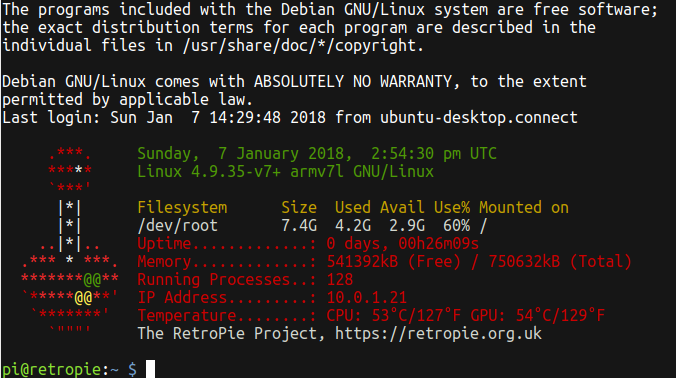
If this works right, you should see something like this:
The RetroPie Project joystick logo

* Note: if you don’t have Linux, this should work OK on a Mac, or on Windows you could try using PuTTY.

Download and compile ffmpeg

Log in to the RetroPie as described above. The commands shown below should all be typed in to the window where you are logged in to the RetroPie.

Download the script ffmpeg-install.sh by typing this:

wget https://github.com/andybalaam/retropie-recording/raw/master/ffmpeg-install.sh

Now run it like this:

bash ffmpeg-install.sh

(Note: DON’T use sudo to run this – just type exactly what is written above.)

Now wait a long time for this to work. If it prints out errors, something went wrong – read what it says, and you may need to edit the ffmpeg-install.sh script to figure out what to do. Leave a comment and include the errors you saw if you need help.

Hopefully it will end successfully and print:

FFmpeg and Codec Installation Complete

If so, you are ready to move on to recompiling RetroArch:

Recompile RetroArch with recording turned on

Download the script build-retroarch-with-ffmpeg.sh by typing this:

wget https://github.com/andybalaam/retropie-recording/raw/master/build-retroarch-with-ffmpeg.sh

Now run it like this:

bash build-retroarch-with-ffmpeg.sh

It should finish in about 10 minutes, and print:

Building RetroArch with ffmpeg enabled complete

If it printed that, your RetroPie now has recording support! Restart your RetroPie:

Restart the RetroPie

Restart your RetroPie.

If you want to check that recording support is enabled, Look for “Checking FFmpeg Has Been Enabled in RetroArch” on the RetroResolution guide.

Now you need to set up RetroPie to record your emulator.

Setting up recording for your emulator

To set up an emulator, you need a general recording config file (the same for all emulators), and a launch config for the actual emulator you are using.

Create the recording config file

Log into the RetroPie as described in the first section, and type this to download the recording config file. If you want to change settings like what file format to record in, this is the file you will need to change.

wget https://github.com/andybalaam/retropie-recording/blob/master/recording-config.cfg

Create a launch config for your emulator

Each RetroPie emulator has a config file that describes how to launch it. For example, the NES emulator’s version is in /opt/retropie/configs/nes/emulators.cfg.

To get a list of all the emulators, log into your RetroPie and type:

ls /opt/retropie/configs

In that list you will see, for example, “nes” for the NES emulators, and “gb” for the GameBoy emulators. Find the one you want to edit, and edit it with the nano editor by typing:

nano /opt/retropie/configs/gb/emulators.cfg

(Instead of “gb” type the right name for the emulator you want to use, from the list you got when you typed the “ls” command above.)

Now you need to add a new line in this file. Each line describes how to launch an emulator. You should copy an existing line, and add some more stuff to the end.

For example, my version of this file looks like this:

lr-gambatte = "/opt/retropie/emulators/retroarch/bin/retroarch -L /opt/retropie/libretrocores/lr-gambatte/gambatte_libretro.so --config /opt/retropie/configs/gb/retroarch.cfg %ROM%"
lr-gambatte-record = "/opt/retropie/emulators/retroarch/bin/retroarch -L /opt/retropie/libretrocores/lr-gambatte/gambatte_libretro.so --config /opt/retropie/configs/gb/retroarch.cfg --record /home/pi/recording_GB_$(date +%Y-%m-%d-%H%M%S).mkv --recordconfig /home/pi/recording-config.cfg %ROM%"
default = "lr-gambatte"
lr-tgbdual = "/opt/retropie/emulators/retroarch/bin/retroarch -L /opt/retropie/libretrocores/lr-tgbdual/tgbdual_libretro.so --config /opt/retropie/configs/gb/retroarch.cfg %ROM%"

The line I added is coloured: The green parts are things copied from the line above, and the red parts are new – those parts tell the launcher to use the recording config we made in the previous section.

When you’ve made your edits, press Ctrl-X to exit nano, and type “Y” when it asks whether you want to save.

Once you’ve done something similar to this for every emulator you want to record with, you are ready to actually do the recording!

Actually doing a recording

Launching a game with recording turned on

In the normal RetroPie interface, go to your emulator and start it, but press the A button while it’s launching, and choose “Select emulator for ROM”. In the list that comes up, choose the new line you added in emulators.cfg. In our example, that was called “lr-gambatte-record”.

Now play the game, and exit when you are finished. If all goes well, the recording will have been saved!

(Note: doing this means that every time you launch this game it will be recorded. To stop it doing this, press the “A” button while it’s launching, choose “Select emulator for ROM” and choose the normal line – in our example that would be “lr-gambatte”.)

Getting the recorded files

To get your recording off the RetroPie, go back to your computer, open a terminal, and type:

scp pi@192.168.0.3:recording_*.mkv ./

This will copy all recorded videos from your RetroPie onto your computer (into your home directory, unless you did a cd commmand before you typed the above).

Now you should delete the files from your RetroPie. Log in to the RetroPie as described in the first section, and delete all recording files by typing this:

Note: This deletes all your recordings, and you can’t undo!

rm recording_*.mkv

Note: This deletes all your recordings, and you can’t undo!

Safer: recording onto a USB stick

Note: recording directly onto the RetroPie like we described above is dangerous because you could fill up all the disk space or corrupt your SD card, which could make RetroPie stop working, meaning you need to wipe your SD card and set up RetroPie again.

It’s safer to record onto a separate USB disk. To find out how, read “Recording to an External Storage Device” in Retro Resolution’s guide.

TECH(K)NOW Day workshop on “Writing a programming language”

Andy Balaam from Andy Balaam's Blog

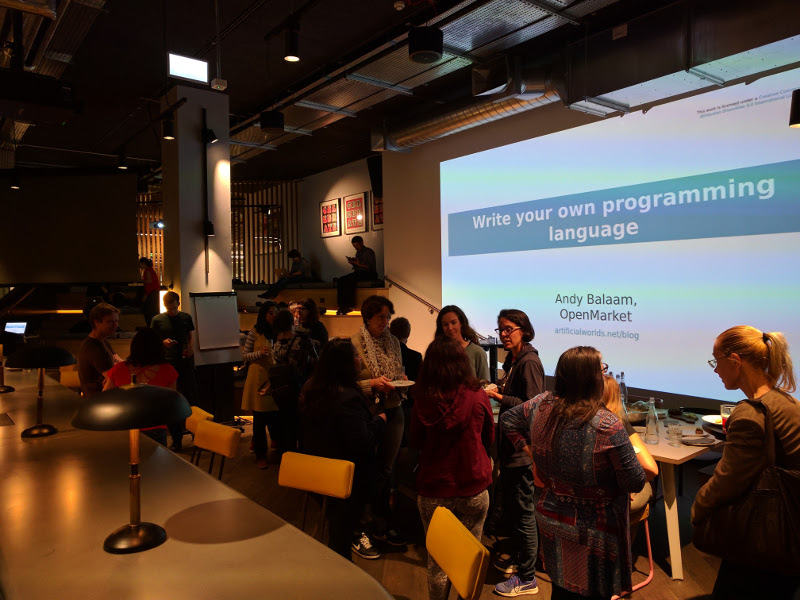
My OpenMarket colleagues and I ran a workshop at TECH(K)NOW Day on how to write your own programming language:

A big thank you to my colleagues from OpenMarket who volunteered to help: Rowan, Jenny, Zach, James and Elliot.

An extra thank you to Zach and Elliott for their impromptu help on the information desk for attendees:

Hopefully the attendees enjoyed it and learned a bit:

You can find the workshop slides, the full code, info about another simple language called Cell, and lots more links here: github.com/andybalaam/videos-write-your-own-language, my blog at artificialworlds.net/blog, and follow me on twitter @andybalaam.

Thanks to OpenMarket for supporting us in running this workshop!

HTML5 CSS Toolbar + zoomable workspace that is mobile-friendly and adaptive

Andy Balaam from Andy Balaam's Blog

I have been working on a prototype level editor for Rabbit Escape, and I’ve had trouble getting the layout I wanted: a toolbar at the side or top of the screen, and the rest a zoomable workspace.

Something like this is very common in many desktop applications, but not that easy to achieve in a web page, especially because we want to take care that it adapts to different screen sizes and orientations, and, for example, allows zooming the toolbar buttons in case we find ourselves on a device with different resolution from what we were expecting.

In the end I’ve gone with a grid-layout solution and accepted the fact that sometimes on mobile devices when I zoom in my toolbar will disappear off the top/side. When I scroll back to it, it stays around, so using this setup is quite natural. On the desktop, it works how you’d expect, with the toolbar staying on screen at all zoom levels.

Here’s how it looks on a landscape display:

and portrait:

Read the full source code.

As you can see from the code linked above, after much fiddling I managed to achieve this with a relatively small amount of CSS, and no JavaScript. I’m hoping it will behave well in unexpected scenarios, because the code expresses what I want fairly closely.

The important bits of the HTML are simple – a main div, a toolbar containing buttons, and a workspace containing some kind of work:

<div id="main">
    <div id="toolbar">
        <button></button><button></button><button></button><button></button><button></button><button></button><button></button><button></button>
    </div>
    <div id="workspace">
        <div id="work">
        </div>
    </div>
</div>

The keys bits of the CSS are:

/* Ensure we take up the full height of the page. */
html, body, #main
{
    height: 100%;
}

@media all and (orientation:landscape)
{
    /* On a wide screen, it's a grid with 2 columns,
       and the toolbar can scroll downwards. */
    #main
    {
        display: grid;
        grid-template-columns: 5em 1fr;
    }
    #toolbar
    {
        overflow-x: hidden;
        overflow-y: auto;
    }
}

@media all and (orientation:portrait)
{
    /* On a tall screen, it's a grid with 2 rows,
       and the toolbar can scroll right. */
    #main
    {
        display: grid;
        grid-template-rows: 5em 1fr;
    }
    #toolbar
    {
        overflow-x: auto;
        overflow-y: hidden;
        white-space: nowrap;
    }
}

That replaces an awful lot of code in my first attempt, so I’m reasonably happy. If anyone has suggestions about how to make “100%” really mean 100% of the real device width and height, let me know. If I do some JavaScript I can make Mobile Firefox fit to the real screen size, but Mobile Chrome (and, I assume, Mobile Safari) lie to me about the screen size when zoomed in.

maven-assembly-plugin descriptor for a simple tarball with dependencies

Andy Balaam from Andy Balaam&#039;s Blog

Today I was trying to make a simple tarball of a project + its dependent jar using the maven-assembly-plugin. I know this is a terrible way to do anything, but hey, just in case someone else wants to do something just as terrible, here are my pom.xml and assembly.xml (the assembly descriptor):

$ tree
.
├── assembly.xml
├── pom.xml
└── src
    └── main
        └── java
            └── AssemblyExample.java
$ cat pom.xml
<project
    xmlns="http://maven.apache.org/POM/4.0.0"
    xmlns:xsi="http://www.w3.org/2001/XMLSchema-instance"
    xsi:schemaLocation="http://maven.apache.org/POM/4.0.0 http://maven.apache.org/maven-v4_0_0.xsd"
>
    <modelVersion>4.0.0</modelVersion>
    <groupId>com.example</groupId>
    <artifactId>myproject</artifactId>
    <name>My Projects</name>
    <version>0.1</version>
    <build><plugins><plugin>
        <artifactId>maven-assembly-plugin</artifactId>
        <version>2.2.1</version>
        <configuration><descriptors>
            <descriptor>assembly.xml</descriptor>
        </descriptors></configuration>
        <executions> <execution>
            <phase>package</phase>
            <goals><goal>attached</goal></goals>
        </execution></executions>
    </plugin></plugins></build>
    <dependencies>
        <dependency>
            <groupId>org.slf4j</groupId>
            <artifactId>slf4j-log4j12</artifactId>
            <version>1.7.2</version>
        </dependency>
    </dependencies>
</project>
$ cat assembly.xml
<?xml version="1.0" encoding="UTF-8"?>
<assembly>
    <id>ap3</id>

    <formats>
        <format>tar.gz</format>
    </formats>

    <includeBaseDirectory>true</includeBaseDirectory>

    <dependencySets>
        <dependencySet>
            <outputDirectory>jars</outputDirectory>
            <scope>runtime</scope>
        </dependencySet>
    </dependencySets>

</assembly>
$ mvn package
...
[INFO] Compiling 1 source file to /home/andrebal/Desktop/assemblyexample/target/classes
[INFO] 
...
[INFO] Building jar: /home/andrebal/Desktop/assemblyexample/target/myproject-0.1.jar
...
[INFO] --- maven-assembly-plugin:2.2.1:attached (default) @ myproject ---
[INFO] Reading assembly descriptor: assembly.xml
[INFO] Building tar : /home/andrebal/Desktop/assemblyexample/target/myproject-0.1-ap3.tar.gz
...
[INFO] BUILD SUCCESS
$ tar -tzf target/myproject-0.1-ap3.tar.gz 
myproject-0.1/jars/slf4j-log4j12-1.7.2.jar
myproject-0.1/jars/slf4j-api-1.7.2.jar
myproject-0.1/jars/log4j-1.2.17.jar
myproject-0.1/jars/myproject-0.1.jar

Women Who Code workshop on “Write your own programming language”

Andy Balaam from Andy Balaam&#039;s Blog

On Wednesday 28th June 2017 a group of people from OpenMarket went to the Fora office space in Clerkenwell, London to run a workshop with the Women Who Code group, who work to help women achieve their career goals.

OpenMarket provided the workshop “Write your own programming language” and funded the food, and the venue was provided gratis by Fora.

We started the evening with some networking and food:

networking

food

but most of the time was spent coding:

coding

with lots of help from our OpenMarket helpers:

helpers

The feedback we got was very positive:

Everyone seemed to be having fun, so we hope we might get invited back to do more in future.

Why do this?

At OpenMarket we want to improve our diversity, and we have started by looking at gender diversity specifically. By being involved with events like this we hope to learn how we can make our company better at welcoming and supporting employees, encourage people from under-represented groups to apply to work here, and improve the general climate in our industry.

Thank you

A huge thank you to the OpenMarket people (from London and Guadalajara!) who helped out – I think people felt welcome and there was plenty of help available for the attendees – you did a great job.

Thank you also for the great response from everyone in our London office – several people in the office wanted to come but couldn’t make it on the night – I am hoping we will get more opportunities in future.

We’re also really grateful to OpenMarket for funding the food, to Fora for providing the space, and to Women Who Code for doing such great work to improve our industry.

Links

[Photos by David Lawson.]

Running a virtualenv with a custom-built Python

Andy Balaam from Andy Balaam&#039;s Blog

For my attempt to improve the asyncio.as_completed Python standard library function I needed to build a local copy of cpython (the Python interpreter).

To test it, I needed the aiohttp module, which is not part of the standard library, so the easiest way to get it was using virtualenv.

Here is the recipe I used to get a virtualenv and install packages using pip with a custom-built Python:

$ ~/code/public/cpython/python -m venv env
$ . env/bin/activate
(env) $ pip install aiohttp
(env) $ python mycode.py

Adding a concurrency limit to Python’s asyncio.as_completed

Andy Balaam from Andy Balaam&#039;s Blog

Series: asyncio basics, large numbers in parallel, parallel HTTP requests, adding to stdlib

In the previous post I demonstrated how the limited_as_completed method allows us to run a very large number of tasks using concurrency, but limiting the number of concurrent tasks to a sensible limit to ensure we don’t exhaust resources like memory or operating system file handles.

I think this could be a useful addition to the Python standard library, so I have been working on a modification to the current asyncio.as_completed method. My work so far is here: limited-as_completed.

I ran similar tests to the ones I ran for the last blog post with this code to validate that the modified standard library version achieves the same goals as before.

I used an identical copy of timed from the previous post and updated versions of the other files because I was using a much newer version of aiohttp along with the custom-built python I was running.

server looked like:

#!/usr/bin/env python3

from aiohttp import web
import asyncio
import random

async def handle(request):
    await asyncio.sleep(random.randint(0, 3))
    return web.Response(text="Hello, World!")

app = web.Application()
app.router.add_get('/{name}', handle)

web.run_app(app)

client-async-sem needed me to add a custom TCPConnector to avoid a new limit on the number of concurrent connections that was added to aiohttp in version 2.0. I also need to move the ClientSession usage inside a coroutine to avoid a warning:

#!/usr/bin/env python3

from aiohttp import ClientSession, TCPConnector
import asyncio
import sys

limit = 1000

async def fetch(url, session):
    async with session.get(url) as response:
        return await response.read()

async def bound_fetch(sem, url, session):
    # Getter function with semaphore.
    async with sem:
        await fetch(url, session)

async def run(r):
    with ClientSession(connector=TCPConnector(limit=limit)) as session:
        url = "http://localhost:8080/{}"
        tasks = []
        # create instance of Semaphore
        sem = asyncio.Semaphore(limit)
        for i in range(r):
            # pass Semaphore and session to every GET request
            task = asyncio.ensure_future(
                bound_fetch(sem, url.format(i), session))
            tasks.append(task)
        responses = asyncio.gather(*tasks)
        await responses

loop = asyncio.get_event_loop()
loop.run_until_complete(asyncio.ensure_future(run(int(sys.argv[1]))))

My new code that uses my proposed extension to as_completed looked like:

#!/usr/bin/env python3

from aiohttp import ClientSession, TCPConnector
import asyncio
import sys

async def fetch(url, session):
    async with session.get(url) as response:
        return await response.read()

limit = 1000

async def print_when_done():
    with ClientSession(connector=TCPConnector(limit=limit)) as session:
        tasks = (fetch(url.format(i), session) for i in range(r))
        for res in asyncio.as_completed(tasks, limit=limit):
            await res

r = int(sys.argv[1])
url = "http://localhost:8080/{}"
loop = asyncio.get_event_loop()
loop.run_until_complete(print_when_done())
loop.close()

and with these, we get similar behaviour to the previous post:

$ ./timed ./client-async-sem 10000
Memory usage: 73640KB	Time: 19.18 seconds
$ ./timed ./client-async-stdlib 10000
Memory usage: 49332KB	Time: 18.97 seconds

So the implementation I plan to submit to the Python standard library appears to work well. In fact, I think it is better than the one I presented in the previous post, because it uses on_complete callbacks to notice when futures have completed, which reduces the busy-looping we were doing to check for and yield finished tasks.

The Python issue is bpo-30782 and the pull request is #2424.

Note: at first glance, it looks like the aiohttp.ClientSession‘s limit on the number of connections (introduced in version 1.0 and then updated in version 2.0) gives us what we want without any of this extra code, but in fact it only limits the number of connections, not the number of futures we are creating, so it has the same problem of unbounded memory use as the semaphore-based implementation.